Blog
Test post
Nov 28, 2025 · Jin
If you manage your business finances using Stripe and want to track revenue, payouts, or customer metrics in Google Sheets, you're not alone.
Manually exporting Stripe data every week (or day!) is time-consuming and error-prone. That’s why more business owners are looking to automate Stripe reports and sync data directly into Google Sheets.
In this overview, we’ll show you how to do that—no code, no scripts, no Zapier workarounds—using a tool called AutoSync to Sheets.
✅ Why Sync Stripe to Google Sheets?
Before we dive in, here’s why this integration is a game-changer:
Real-time financial tracking – Monitor revenue, failed payments, churn, and refunds without logging into Stripe.
Custom dashboards – Use formulas, charts, and filters in Sheets to create custom reports for your team or investors.
Collaborative access – Share insights with your accountant, co-founder, or marketing team via Google Sheets.
Save hours – Eliminate manual CSV exports and copy-pasting.
⚡ The Easiest Way: AutoSync to Sheets
AutoSync to Sheets is a no-code tool that connects your Stripe account directly to a Google Sheet.
Once connected, your data is automatically updated daily. It supports syncing:
Stripe charges
Customers
Invoices
Payouts
Refunds
And more
🛠️ Step-by-Step: Sync Stripe to Google Sheets
Here’s how to get started:
1. Go to AutoSync to Sheets
Click Get Started or Connect Your Stripe Account. You’ll be prompted to log into your Stripe dashboard securely.
2. Authorize Access
Approve the connection so AutoSync can read your Stripe data (but never write or modify it).
3. Pick the Data You Want
Choose which Stripe objects you want to sync (e.g., Charges, Customers, Payouts).
4. Select or Create a Google Sheet
AutoSync will either:
Use a Sheet you already created, or
Generate a new one for you automatically
5. Done!
Sit back. Your Stripe data will now automatically appear in your Google Sheet—updated daily and ready to use in dashboards, pivot tables, or reports.
Check out this detailed guide for how to configure AutoSync.
📊 What You Can Build With It
Here are a few examples of how teams can use AutoSync + Google Sheets:
MRR dashboards for SaaS founders
Weekly revenue summaries sent to Slack or email
Failed payment trackers
Affiliate or partner payout reports
Investor update templates
🧠 Pro Tips
Use Google Sheets formulas to calculate net revenue, churn rate, or LTV.
Combine with other data sources (e.g., ads, product usage) for holistic reporting.
Create charts directly inside Sheets to visualize trends automatically.
🔐 Is It Safe?
Yes—AutoSync uses Stripe’s official OAuth flow and all data is transferred securely using encrypted connections. You can revoke access at any time from your Stripe dashboard.
🏁 Get Started Free
You can try AutoSync to Sheets free and sync your Stripe data in just minutes.
Stop exporting CSVs. Start automating your Stripe reports.
This blog post will serve as your quick guide to set up and use AutoSync for Google Sheets. Get ready to experience a new level of efficiency by scheduling, automatically exporting your business data, and never having to manually download a CSV file again. Let's get started!
Getting started
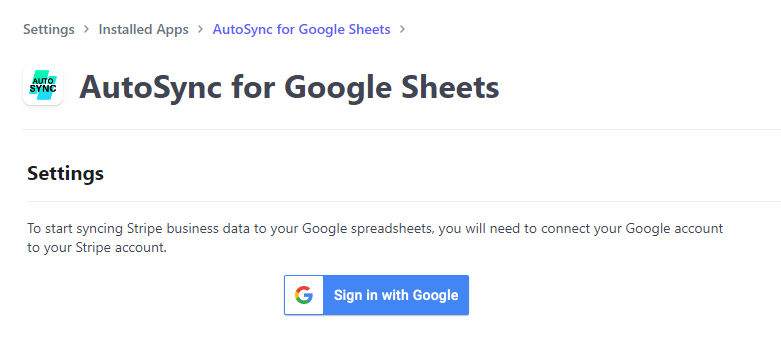
Install the app from the Stripe App Marketplace. Doing so will allow the app to read data from your Stripe account and allow you to configure what data gets synced to which Google spreadsheets.
Logging into to a Google account
If this is your first time using AutoSync for Google Sheets, you'll have to log in to your Google account and approve the app to write data to your Google spreadsheets.
Check the first permissions box, shown below, and click "Continue". AutoSync for Google Sheets will only create and write to your spreadsheets.
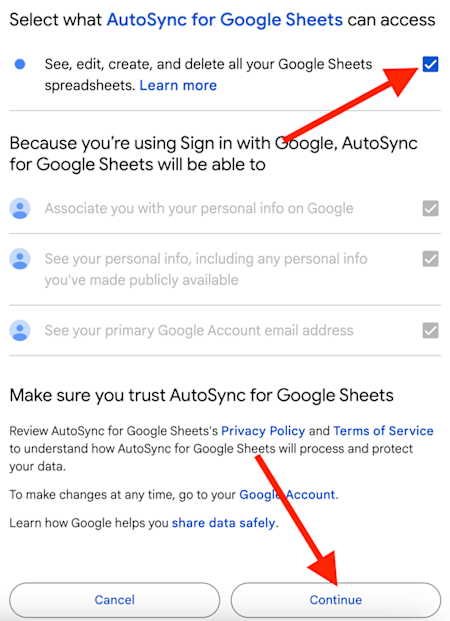
Once you've logged in and allowed the app to access your Google Sheets, you can start to sync data.
Syncing Stripe business data to a new spreadsheet
The user interface for this app is very simple so that you can get up and running quickly. You can do everything within the app as well. There's no need to do anything in your Google Sheet unless you want to manipulate or see the data.
To starting syncing data to a new spreadsheet, just select "New spreadsheet" from the dropdown menu and click "Create and configure".
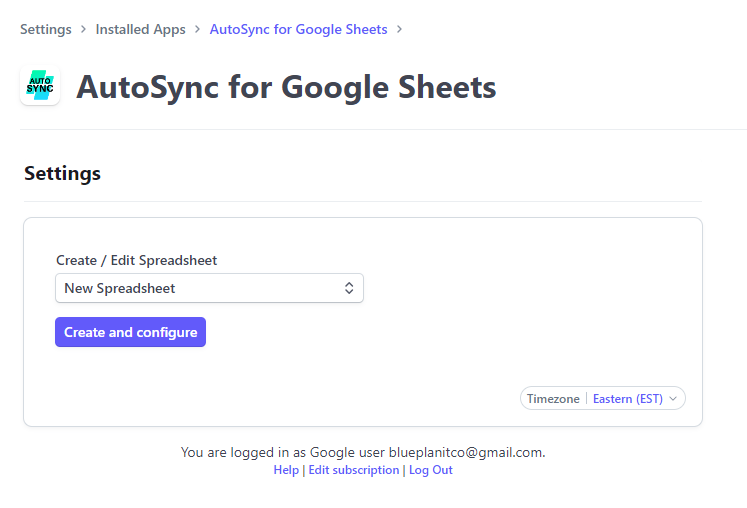
Doing so will create a new spreadsheet file in your Google Drive. Next, you can start to configure what data you want to sync to this newly created spreadsheet.
You can add a new sheet or "tab" to your spreadsheet directly in this side bar that shows up.
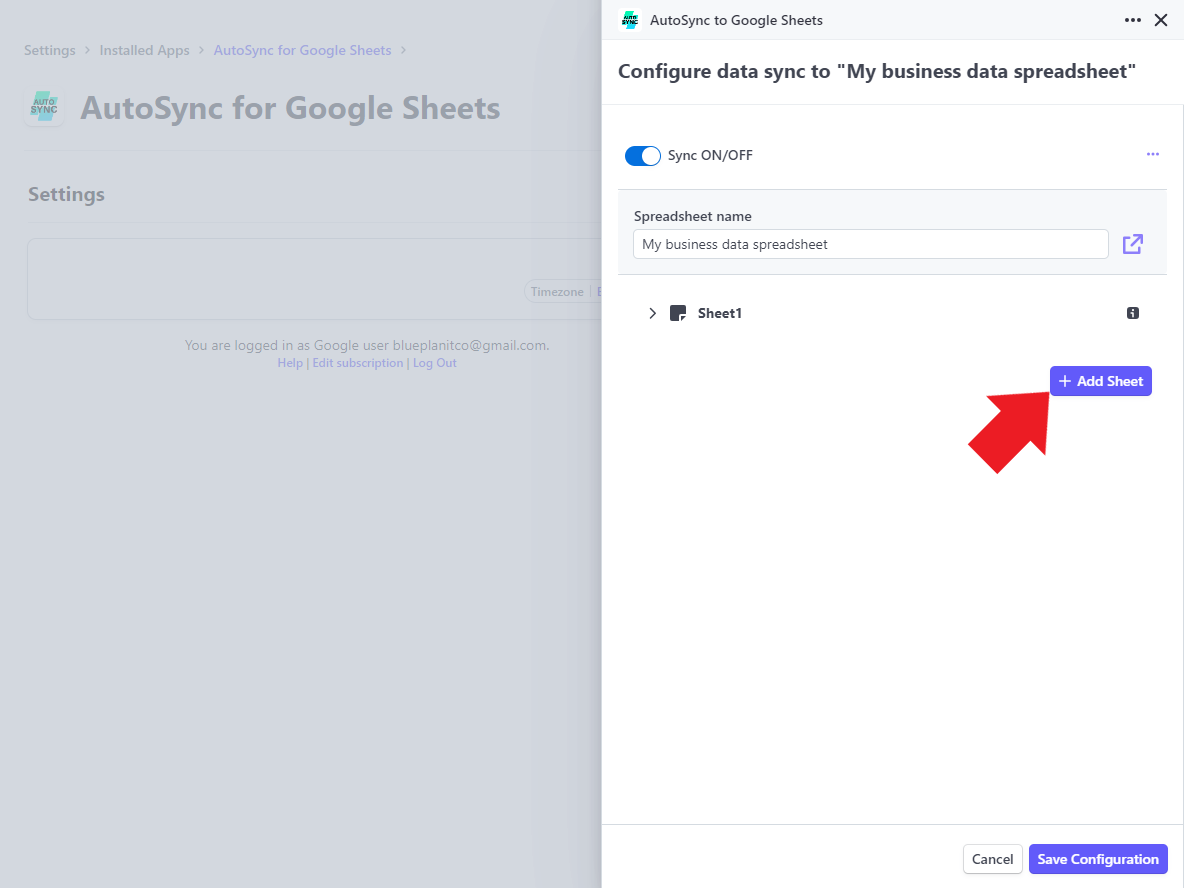
You can also click on the sheet name to set what Stripe data gets synced to that sheet like so:
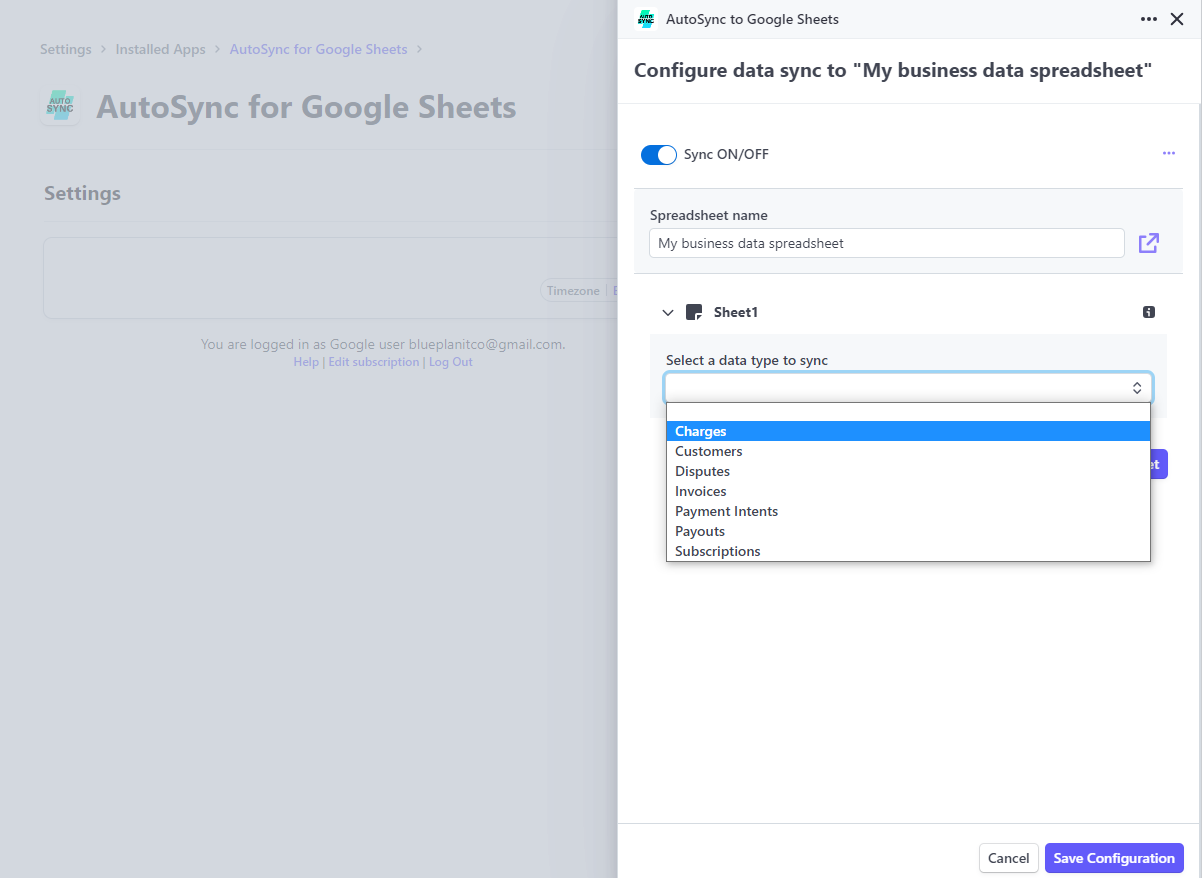
Add as many sheets as you like and configure them to sync data like charges and purchases, invoices, subscriptions, customers, and more.
Once you're done, click "Save configuration" at the bottom right.
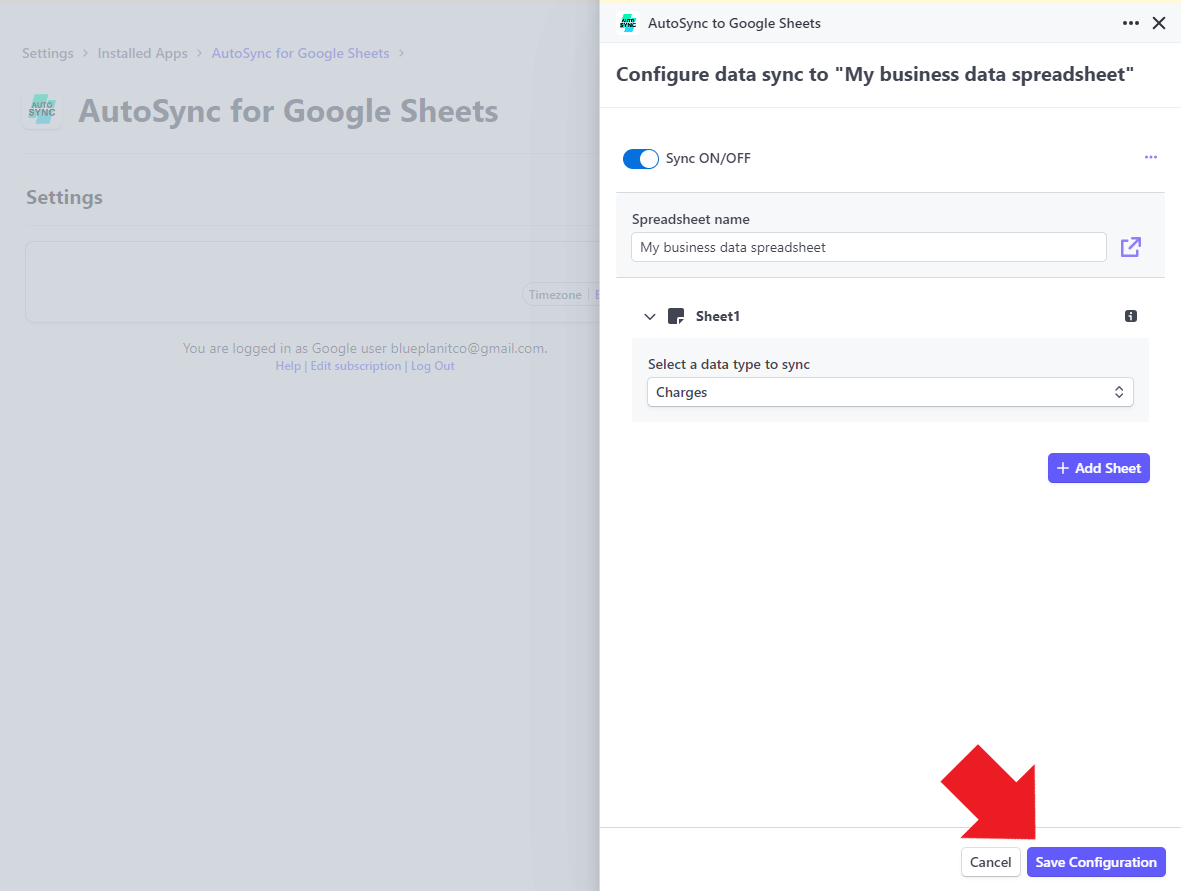
And that's it! Your spreadsheet is ready to receive Stripe data. Note that the data will be synced at 1 AM every night depending on your time zone.
Setting your time zone
To set your time zone, click the time zone button at the bottom right of your settings page like so:
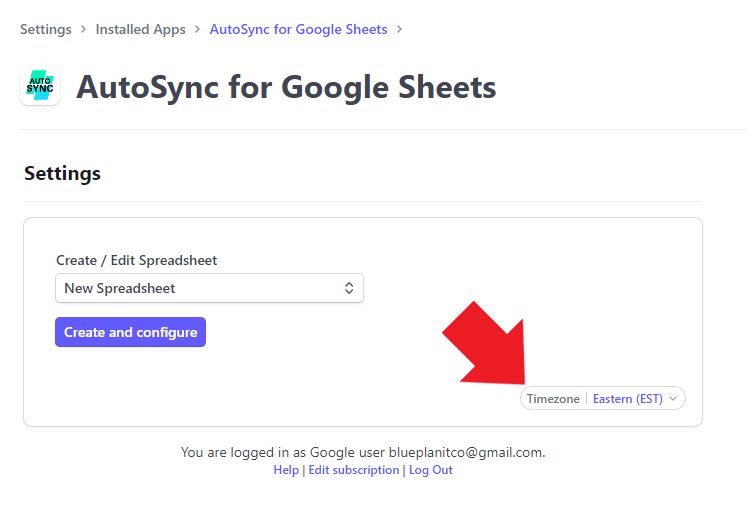
Set your time zone so that your data will be synced every night at 1 AM.
Manually sync data
If you want to see Stripe data for a specific spreadsheet before the scheduled nightly sync time, select the spreadsheet from the settings page and click "Configure".
Then, navigate to and click on the three dots at the top right and click on "Start manual sync".
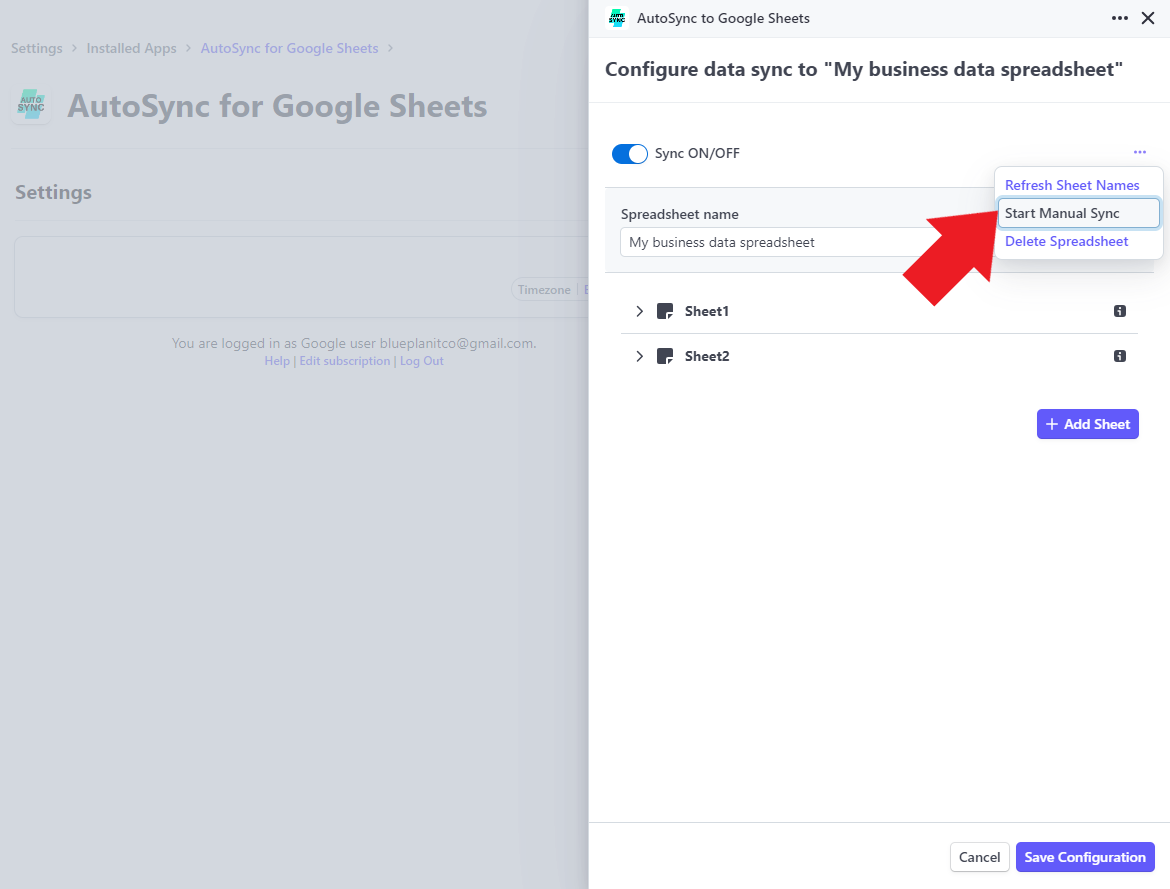
Doing so will trigger all the Stripe data that has not been exported to this spreadsheet since the last sync and write it to your spreadsheet right away.
If you have any questions about how to use the AutoSync for Google Sheets app or are having an issues, please send an email to admin@blueplanit.co and we will try to resolve your issue as soon as we can. Thanks.